Wednesday, March 26, 2014

Chicken Jerk Marinade

Yummy Nummy Jerk Marinade

Anyone who has gone gluten free miss Jerk? Well, to be totally honest. I had never experienced any sort of Jamaican cuisine prior to going on my diet. Soooooooo honestly, I can't tell you how authentic this recipe is. Only that it's very tasty and family pleasingly good. Now, apparently to have good jerk, you need some spice. If your taste buds require a bit of a kick, use 2-4 habanero peppers. Now, being that my daughter and grandpa are not such fans of the tasty little orange peppers, I use roughly 1/4 cup bell pepper. Really, it can be any sort of color. Red, green, yellow, purple, orange. Speaking of peppers, have I told you how much I adore bell peppers? I am currently growing every color imaginable (well....all except for white bells. I have yet to find seeds of that variety....Sooooooon I will have them. Soooooon).


Now to get back to business. The recipe for this tasty little number is as follows:
Jerk Marinade
2 habanero peppers (or, if you do not want the heat, 1/4 cup diced bell pepper)
5 green onions cut into 2" pieces
2 teaspoons fresh chopped thyme
1 teaspoon garlic powder
1/4 cup brown sugar
1 tablespoon gluten free tamari soy sauce
1 tablespoon rum
2 tablespoons water
salt and pepper
3-4 lbs chicken pieces (or 4 cornish game hens)
Place the peppers green onions, thyme, garlic powder, brown sugar, soy sauce, rum, and water in a blender and puree until liquidfied. Rinse chicken pieces and place in a large ziploc bag. Pour marinade into the bag, seal, then toss to incorporate evenly. Refridgerate for at least 5 hours or if possible, overnight. After chicken has marinated for the required time, preheat oven to 300. Place the chicken in a baking dish and season with salt and pepper. Bake for 45 minutes. *will not be cooked all the way* Meanwhile, light your grill to medium high heat. Place the chicken in the grill and cook turning occasionally for a total of roughly 20 minutes. Let chicken rest for at least 10 minutes before serving.


Monday, February 10, 2014

MercoBox Review

Now this is a fun review I have been excited to share with you. I recently was offered the opportunity to receive and review a unique and exciting thing. A box. Yep, you heard me right, this box is both an exciting and a great idea.


So here is what the MercoBox is all about. It's a box full of products, gift cards, and coupons that showcase all the offerings available from locally owned businesses. What's even cooler is that you get a new selection of products each month. I can discover companies locally that I most likely would not found otherwise.  I love the idea of supporting local merchants. Keeping dollars and jobs right here locally. Being a small business owner myself, I am 100% in support of shopping locally and keeping my hard earned $$ right here in my community. So it only made sense for me to become a MercoBox subscriber. I have to say, I'm pretty excited to get my monthly box of goodies. To me it's almost like Christmas as each month will include a new selection of products for me to try.

So here is my lovely little box:

And here be my box of surprises:
And here are some of of my favorite things.
Now I really loving these fragrances. I am still deciding on which one I like best.
 Ok, now this is a product I would have NEVER have thought of nor would I have realized this was a Utah company. This little number actually catches hair before it turns into a clog and creates that awful slow icky drain issue us girls so frequently deal with.
 All natural and homemade soap!
 K, so the blush samples combined with a coupon with free shipping made for a total instabuy. I'm a sucker for shiny sparkly things and shimmery makeup is no exception. 


So wanna know how it works? How can you get your hands on a box of your own? It's easy peasy and what's even better is that your box will be delivered to your home with your monthly subscription.

And here is the lovely little hyperlink for MercoBox. Check it out :)

Also, please visit their home website Merco Local for great deals being offered by local merchants. New deals are posted weekly and just like the box....it's all local.

P.S. The opinion on this blog post is non other than my own. I have not been paid or been persuaded in any manner to give a positive, neutral or a negative review.

Thanks for reading and have a wonderful day!

Monday, January 20, 2014

Spiced Lentil and Tomato Soup

Spiced Lentil and Tomato Soup

Ok, so I do apologize in advance for another lentil recipe. We really do love lentils at the Wilkins home. Even the picky husband and tike enjoy em. It's nice too that they like them because they are little nutritional powerhouses that are packed full of protein and fiber. Not to mention.....cheap! One of my daughter and my favorite snacks are sprouted lentils. So easy to make and tasty. I'm getting off track though....back to the recipe. It's sweet, savory, spicy. Yum. If you are a vinegar freak, drizzle some balsamic vinegar in your hot steamy tasty soup. Did I say YUM?


Spiced Lentil and Tomato Soup

4 1/2 cups vegetable broth (or chicken makes a nice substitute)
4 medium sized carrots chopped
1 medium onion chopped
2/3 cup green lentils rinsed
1 6oz can tomato paste
1 tablespoon dried parsley flakes 
1 can diced tomatoes
1 tablespoon brown sugar
1 tablespoon balsamic vinegar
1/2 teaspoon garlic powder
1/2 teaspoon thyme
1/4 teaspoon dried dill
3/4 teaspoon salt
1/4 teaspoon pepper
3/4 garam masala

In a large pot combine broth, carrots, onion, and lentils. Bring to a boil. Reduce heat and simmer for 20-30 minutes (or until lentils are tender). Stir in remaining ingredients, bring to a boil, and cook for an additional 5-7 minutes. Or........place all ingredients in a slow cooker and cook on medium for 4 hours. 
Hi Everyone

Here is a little shout out and an opportunity for a free DVD set on turning your backyard into a food producing paradise.

For anyone on facebook, here is Marjory's page on growing your own groceries. She has some great stuff!
Marjory Wildcraft's Grow Your Own Groceries

And here is the link to the contest. Good luck!


Grow Your Own Groceries DVD Set contest

Saturday, November 9, 2013

Gluten Free Cookbook Review

Howdy Y'all! It has certainly been a while since I have posted. Mainly because of my focus to run the Chicago Marathon. With that out of the way and actually surviving I can now focus on more important things. Like food. Did I mention totally awesome and incredible food? To be more specific. Bread. Lots and lots of bread. Now, I was lucky enough to be contacted to do a review on a recently published gluten free bread recipe book Gluten Free Bread more than 100 Artisan Loaves for a Healthier Life by Ellen Brown. Here is what is so exciting....over 100 DIFFERENT and might I add very unique and delicious bread recipes. This is not your dry, crumbly, might work better as a coaster gluten free bread recipes that us Celiacs and anti-glutites have come to know all too well. This book has many varieties and Artisan breads that we normally have to go without.

What caught my attention when I first was the author's preface...Bread is the staff of life. It is the essential food. The first petition in the Lord's Prayer "Give us this day, our daily bread." It's not "give us this day our daily banana smoothie." I had to chuckle at that last sentence lol! For people like me who has relatively given up bread and having the experience of enjoying a fresh out of the oven warm slice of bread and butter, this book is truly a blessing. Yes, we can buy a frozen brick, and might I add SMALL, of gluten free bread at most grocery stores, but honestly....why would we want to pay nearly $8 for bread that is full of refined starches and made months previously? In my book, that's just silly. So, I normally just go without, which I know many of us do. Now, it's not to say I haven't tried my hand at TRYING to make gluten free bread at home. Lets just say.....It has not been one of my crowning achievements lol! There are some really great things that I love about this book. First off, each bread recipe has healthy whole grain and protein packed bean flours which not only add amazing taste, but GREAT nutrition. Next (and honestly, this is my favorite part), each recipe has it's own particular blend of flours. I completely agree with the creator of this cook book that there is NO magical blend of gluten free flours. For each loaf to turn out amazing and and JUST like it's gluten filled counterpart, there needs to be a specific ratio of particular flours. What also is exciting is for EACH recipe, the author has included two types of measurement per ingredient of each recipe. Because of the dynamics of gluten free cooking, sometimes using the standard cup/spoon measurements will not lend an optimal outcome, SO she has included the weight to use for each ingredient along with the standard cup/spoon measurement. Now, honestly, I took the lazy man's way and just used my cups and spoons for each recipe I tried. BUT, I have been leaning toward using weight measurements in my gluten free baking as I know it provides more exact amounts required. As grateful as I am for the two sets of measurements I can only imagine the work this woman went into to create each recipe. Way to go Ellen!!

Now, I tried my hand and three of the recipes. All of which turned out fabulously. Well, aside from the white sandwich bread (which was due to MY fault at letting it rise in too warm of a location. I will be giving the sandwich bread a second attempt and am very excited to see the results. Now, that being said, the flavor and texture was amazing on this bread and I can't wait to dig into a big ol' cold cut sandwich using my very own homemade bread.

The first recipe I whipped up was obviously the White Sandwich Bread. Now, like I said, the end result of the loaf really had nothing to do with the recipe itself. It had more to do with my house being FREEZING cold and me letting it rise in my oven which I had warmed up. Unfortunately it was too warm and my dough rose a bit TOO much and proceeded to overflow a bit like molten lava out of a volcano haha! Still, the end result was very delicious, it just lacked the "pretty factor" so no picture was taken.

Recipe #2 I tried out is the Multiseed Bread. Holy heck on fire. This one was fabulous! I have really missed a good hearty whole grain bread filled to the brim with seeds and grains. My family loves Dave's Killer bread which to me looks and smells AMAZING. Boy, there have been times I have considered taking a big ol' bite out of one of those pieces, but the end result has obviously kept those cravings at bay. Well, not anymore. This bread was so fun to make and SO easy! What I really appreciated is the author's use of ground up chia seeds as the binding agent in the bread. So not only do we not need xanthun gum which lends absolutely NO nutritional value, but we now have a binder AND all the nutritional punch that chia seeds offer. Yet another thumbs up for Ellen Brown :) This loaf is also a quick bread and no yeast or time to rise was needed.


  Recipe #3 is the Beer Bread recipe. I myself have never tried beer bread. However, I have two dear friends that are always raving about tasty warm freshly baked beer bread. So, I was very excited when I saw a gluten free beer bread version in this book. Let me tell you. Beer Bread IS rave worthy :) I made a fresh loaf to go with a spicy batch of chili and Oh MY Goodness. Perfect combination.


And here we have all my lovely leftover beer bread drying to be used for Thanksgiving's gluten free stuffing. Yet another wonderful suggestion from the author (since there is just no way I could eat that entire loaf)


In closing....I love this book. I really do. Now, I have in NO way been paid or coached to add a positive review on this book. All opinions expressed are my own. This book is wonderful and I enjoyed trying new recipes and look forward to trying more. Plus.....let me tell you, there is a downright GENIUS bagel recipe in here that I will be sharing in the future. Thanks as always for reading my blog and I look forward to sharing more healthy and tasty gluten free recipes with you all.

Jill ~The Pink Cowgirl~

Friday, August 9, 2013

Oven Roasted Summer Vegetables

Oven Roasted Summer Vegetables

Ok, so this is another loose recipe. Basically, it's whatever you have surplus from your garden or refrigerator. For me, it's bell peppers, eggplant, and summer squash (namely crookneck and zucchini). Plus, this wonderful side is so darned easy and can be put together in a jiffy.


So here it is.

Preheat your oven to 400. Then you will want a total of 7 cups of chopped vegetables and 1/4 cup olive oil. I used 1 onion, eggplant, zucchini, crookneck squash, and 1 large red bell pepper. Toss all together in a large bowl then add salt and pepper tossing a bit more. Pour into a casserole dish, cover, and bake for 30-40 minutes until vegetables are cooked and slightly browned on the edges.

Soooooooo ya, that's it. You can pretty much use any vegetable, just cover with oil, salt, and pepper then roast in your oven. As my wonderful friend Sharla once said, sometimes the simplest of ingredients makes for the most delicious of dishes :)

Happy cooking everyone!

Wednesday, May 1, 2013

All about gluten free

As I get asked quite frequently about getting started going gluten free and since May is officially the gluten free month, I decided to write up a quick reference guide/post thingy that hopefully will help answer any questions you might have about eating and cooking gluten free. I will most likely be updating this blog quite frequently as I get new information or find new tools on the web.

To start.....going gluten free is actually very easy. Cut out the processed foods and go back to whole foods. Namely, meats, vegetables, fruits, eggs, milk, nuts, and gluten free grains. Most of gluten will lie in processed foods like bread, cookies, crackers, sauces, frozen dinners, boxed meals (hamburger helper anyone?). So if you are nervous about completely changing your eating lifestyle or are so confused with gluten free and it's flour blends, weird grains, xanthan gum, ect.....take a deep breath and realize, that you can still eat and eat well just by shopping around the EDGES of the grocery store. Seriously, that is where you will find the food that is NATURALLY gluten free. It's the isles of the store where most of the food containing gluten lies.

Now that you have an idea of where to start.....lets talk about food ingredients that are taboo. That will help you on your way to learning to read labels and knowing exactly what you are putting into your body. Prepare to become a label reading Nazi. Basically, to avoid gluten you will need to cut out wheat, barley, and rye. Now.....here is the thing about oats. Oats are NATURALLY gluten free, BUT are cross contaminated VERY easily. They can even pick up gluten from the fields they are grown in. So unless the package states Certified Gluten free, do not consume. Here is a wonderful link that lists everything to steer clear from:Unsafe Foods List. It's a wonderful quick reference to all ingredients that would contain gluten. If you have a smart phone, put it as one of your favorites so you can reference it quickly while on the go. Now, my blog is a gluten free AND corn free blog as I am intolerant to corn and it affects me much as gluten does. The good news is, corn IS gluten free AND is very versatile. So by all means, enjoy your nachos, corn tortillas, polenta, and good ol corn on the cob :)

Next is how and where to eat out. Most restaurants are wanting to capitalize on the "gluten free movement" so you will be able to find many places will offer choices that he can eat. There is a great app you can get called FindMeGlutenFree. It searches using the gps location function on your phone to search for all fast food joints and restaurants that offer gluten free options or a gluten free menu. It also has user's comments which is great because some places that state that they offer gluten free, may either have a pitiful selection or the food was cross contaminated by an uneducated staff. Even though this app works wonderfully and I use it weekly, I still find it's best to call ahead to an establishment to verify IF they offer gluten free and what are the menu items/options.

Speaking of cross contamination.....it is imperative to be super duper uber careful if you are celiac or gluten intolerant. The littlest spec of gluten will make you sick and if you are celiac, throw your body into an auto-immune reaction. You will need to have your own toaster, condiments (mayo, peanut butter, butter, ect) as it is SO easy to contaminate jars if there is still normal bread in the house. This is how easy it is to cc (cross contaminate).....you use a butter knife to spread some jam on a roll or bread of the regular gluten filled variety, then stick it back in the jar to get a bit more and BAM! It's been contaminated and is no longer safe for us anti-glutites. For more tips and information on avoiding cc in your home and kitchen please visit this link: Avoiding Cross Contamination

Next on the list are gluten free flours and baking. Now, I do not doubt that even the thought of gluten free eating is scary, let alone being overwhelmed with the plethora of flours, flour blends, and gums. So I will try to explain things simply so you have a better understanding of gluten free flours, why we use blends, and the need for gums like xanthan or guar. Gluten is a binding protein found in wheat, barley, and rye. If you have ever made bread or watched someone make it, you can see the strands of gluten when kneading your dough. It's what creates those lovely little fluffy bubbles in your bread and holds all of your baked items together. Now, unfortunately when you bake gluten free, there is no more bind. That is where xanthan gum or guar gum come in. In the correct ratio's, it will replace the gluten's binding and will help your baked goods stay together. Here is a "rule of thumb" ratio on different types of baked goods:

Bread and pizza dough recipes: Add 1 teaspoon xanthan gum or guar gum per cup of gluten-free flour used in bread and pizza dough recipes
 
Cake, muffin and quick bread recipes: Add 1/2 teaspoon xanthan gum or guar gum per one cup of gluten-free flour used
 
Cookie and bar recipes: Add 1/2 teaspoon (or less) xanthan gum or guar gum per one cup gluten-free flour used 
 
Now, as for gluten free flours. Unfortunately there is not one gluten free flour that can be used as a cup for cup replacement with regular all purpose flour. You will need to have a combination of flours to mimic the protein and starch that regular flour contains. I'm sure it's overwhelming when you start seeing flours like sorghum, teff, millet, bean, sweet rice, tapioca starch. The good news is that many wonderful gluten free bakers and bloggers have come up with wonderful gluten free flour blends that are premade AND can contain the proper flour/gum ratio and will measure cup for cup with regular flour. So the guess work is taken out and you can bake pretty much ANY recipe out there just by using your gluten free all purpose flour blend. So don't toss out your good ol' Betty Crocker cookbook, keep it and keep using your recipes JUST like you would with normal flour. The drawback to premade gluten free flour blends is that they are expensive. By being a stay at home mom, I have needed to learn how to pinch my pennies. I have found the most cost effective way to feed me and my family is to just make everything from scratch. I buy my gluten free flours in bulk and keep them in containers in my spare freezer. The reason I keep them frozen is that some flours like brown rice flour has a very short shelf life. By keeping it frozen, I can extend my use of it by MONTHS. I buy my flours at two different places. First being Winco and second at the Asian store. Most Asian stores will have potato starch, tapioca starch, and both sweet and white rice flour. Winco is awesome because I can buy my xanthan gum, brown rice flour, tapioca starch all in their bulk section. Another wonderful thing about Winco is that they offer gluten free noodles, granola, oats, quinoa, and many different types of rice in their bulk saving you TONS. I can get a pound of gluten free noodles for $2 vs. $7 at a health food store. All I am paying for is pretty packaging which will just be tossed in the trash anyway. Next is a little list of flours that I have found to work wonderfully with cooking:
 
Sweet rice (otherwise known as glutinous rice) works wonderfully with creating white sauces and gravies. It will make a nice thick cream soup or make divine gravy. It is very finely ground and will not have a grainy texture
 
Bob's red mill gluten free flour blend is great for making roux for gumbo's as it has a hearty rich flavor. It also works well with baked goods, just don't taste the batter before it's baked, you will have a bitter batter that is not so pleasing to the palate haha!
 
Corn starch works great as a thickening agent to create glazes or sauces like sweet and sour chicken sauce. If you are intolerant to corn, then arrowroot starch or tapioca starch work well as a substitute.
 
There are many wonderful blogs and websites that feature gluten free cooking and baking. I try to keep mine updated, but unfortunately life gets ahold of me and I can get pretty busy. Here are some of my "go to" places when I need inspiration in the kitchen:
 
Gluten Free Homemaker not only does she offer family friendly gluten free recipes, but she hosts a gluten free Wednesday where other bloggers can showcase their recipes.
 
Fave Gluten Free Recipes this website ROCKS! Everything listed is gluten free and there are TONS of recipes to pick from :)
 
Jules Gluten Free blog is wonderful! She offers a great gluten free flour blend with lots of yummy treats and baked goods recipes.
 
Hopefully you can feel a little more confident in delving into the world of gluten free. Please feel free to ask any questions you might have. I will be updating this post periodically as new information comes my way or I learn new tricks to the gf trade.
 
Jill - The Pink Cowgirl


Overnight Chicken

 
Overnight Chicken
 
 
Want to add a kick to your chick? Looking for a new way to serve up that cooking staple chicken breast?
 
Now when the planets are aligned and the karma smiles down on the Wilkins home. I'm able to plan our dinner the NIGHT before. Not looking at the clock ticking away at 6:20pm thinking "now WHAT am I going to make for dinner?". Not that this recipe isn't easy peasy, but it's just the matter of planning on my part. Meaning, I have to take out my frozen chicken, thaw it, then whip up the marinade. SOooooOOOOooOOoo like I said earlier....when life slows down just a bit, I will whip up this tasty bird marinade.
 
I don't honestly know where I found this, but I stumbled across it whilst browsing the interwebs one day. After trying it out, I realized that this would certainly be a regular dish at our house. First off, I most always have chicken in my freezer. Secondly, the marinade ingredients should pretty much be in any kitchen. No need to go to the store for that ONE item then ending up filling your cart with impulse buys. Not that I would know anything about that hehehe.
 
 
So, here it is. Try it. Eat it. Love it.


Overnight Chicken
 
4 chicken breasts or 5-6 skinless chicken thighs
1/2 cup honey
1/3 cup Dijon mustard
1 Tablespoon curry powder
4 Tablespoons soy sauce
 
Mix together the honey, mustard, soy sauce, and curry powder.
Put the chicken and marinade in a ziplock plastic bag then refrigerate overnight.
The next day, pour the chicken with all the sauce into a baking dish, cover, and bake at 350 for at least an hour. Then uncover the chicken and baste and bake an additional 15 minutes.
 
You can slice the chicken in strips an serve over rice or on it's own with a side of veggies and taters. Enjoy!

Tuesday, April 9, 2013

Honey Soy Glazed Carrots


Honey Soy Glazed Carrots


Want an easy, delicious, quick, tasty, can be whipped up in a jiffy side dish? Want a recipe with just four simple ingredients you will already have in your pantry? Want to get your picky little tike (and husband for that matter) to eat cooked carrots without scrintching up her nose? Make this recipe. Now, I love carrots. In fact.....want to be let in on a little secret? I eat so many carrots the  bottoms of my feet and palms of my hands are orange. No JOKE. You wouldn't really notice (thankfully, unless I held up my hand next to yours). Apparently it's a known condition called carrotitis or something like that. On a whim I Googled it. Guess it's good to know I'm not the only human Bugs Bunny out there. Now why doesn't HE have orange hands and feet.....I would really like to know. Ok, so to whip this little number together, all you need to do is peel 1 lb of carrots then place in a saucepan with 1/2 teaspoon salt.  Bring to a boil and cook until slightly tender (about 6-8 minutes). Drain then set aside. In a large skillet, melt 1 tablespoon butter. Stir in the carrots and soy sauce bringing the heat to high. You will want the carrots to get browned in spots, so only stir occasionally (for only about 2 minutes). Once the carrots have some nice coloring, stir in the honey and cook until carrots are glazed nicely. About 1-2 minutes.


Thats all folks! hehehe.
 
Honey Soy Glazed Carrots
 
1 lb Peeled Carrots
1 Tablespoon Butter
1 tablespoon Gluten Free Tamari Soy Sauce
1 Tablespoon Honey
 
 
In a large saucepan filled with water, carrots, and 1/2 teaspoon salt to a boil. Cook until slightly tender (about 6-8 minutes). Drain then set aside. In a large skillet, melt 1 tablespoon butter. Stir in the carrots and soy sauce bringing the heat to high. You will want the carrots to get browned in spots, so only stir occasionally (for only about 2 minutes). Once the carrots have some nice coloring, stir in the honey and cook until carrots are glazed nicely. About 1-2 minutes.


Tuesday, January 8, 2013

Jalapeno Quinoa Bites

Cheesey Quinoa Quiche Bites

Who would have thought a recipe donning two Q's could be so tasty and so easy. Plus, lets talk about their versatility. What's great is as long as you have the quinoa, eggs, and cheese as a base, you can throw in almost anything. Tomatoes, shredded carrots or zucchini, feta, basil. I love making these little guys then putting them in a ziploc baggie and freezing them for morning emergencies when I just don't have time to make anything. Perfect little protein and fiber packed bites.


Yes. I heart these little bites :)
Now, here is how to make them.

Jalapeno Quinoa Bites

1 cup cooked quinoa
1 egg
1 egg white
1 1/2 tablespoons diced jalapenos
1/2 cup shredded colby jack cheese
1 tablespoon parmesan cheese
dash of salt

Lightly grease a mini muffin tin. Blend all ingredients together well and spoon roughly a tablespoon in each mini muffin cup. Bake at 350 for 20 minutes.

*can be frozen then microwaved at 25-30 seconds each to satiate major munchie cravings*

Saturday, December 1, 2012

Candy Apple Jelly


Candy Apple Jelly


Hello everyone out there in internet land. I have a delicious and festive jelly recipe for you to try JUST in time for Christmas. You will not believe how easy this is and how tasty the end result is. I find myself making more and more each year as friends and family have come to expect this tasty concoction around the holidays. I also have to admit....I do enjoy making batch after batch of the crimson red stuff as my house smells of Christmas all day after making it. Who needs candles right? 

Isn't this just beautiful? Add some silver ribbon and a little jingle bell and you have the perfect little festive homespun gift :)


Here is the recipe breakdown:

Candy Apple Jelly

5 cups apple juice (no sugar added)
1 box pectin
1 cup red hot candy
7 cups sugar

In a large pot combine the apple juice, pectin, and red hots and heat on high stirring constantly. Bring to a rapid boil that cannot be stirred down. Boil for one minute. Stir in the sugar and continue stirring until completely dissolved. Stir frequently and bring to a rolling boil that cannot be stirred down. Boil for one minute. Remove from heat and ladel into hot jars leaving 1/4″ headspace. Hand tighten lids and process in a water bath for 5 minutes. This recipe will make about 8 half pint jars of beautiful red jelly.

Sunday, November 18, 2012

Old Fashioned Beef Stew

Old Fashioned Beef Stew


Comfort food in a bowl. That's what this recipe is all about. When your cold after digging holes all day in the chill of winter or shoveling frozen horse manure this is the perfect way to warm you from the inside out. Well, ok, maybe your winter activities might be a little different than mine, but hey, you get the picture right? Now, my husband's dear grandma loves Paula Dean. She is so cute to watch her show every day and she calls me weekly to find a recipe online then type it up for her. The poor dear is legally blind and she can't write down the ingredients and instructions. Anyway, long story short. I frequent Miss Dean's website frequently. Well, this here is one of the tasty little numbers I came across and had to make. Verdict? Thank you MAM I will make AGAIN. 


Old Fashioned Beef Stew

2 pounds stew beef
2 tablespoons olive oil
2 cups water
1 tablespoon Worcestershire sauce (Lea and Perrins is a great gluten free brand :)
1 clove garlic, peeled 

2 bay leaves
1 medium onion, sliced
1 teaspoon salt
1 teaspoon sugar
1/2 teaspoon pepper
1/2 teaspoon paprika
Dash ground allspice or ground cloves
3 large carrots, sliced
3 ribs celery, chopped
2 tablespoons tapioca starch


Brown meat in hot oil. Add water, Worcestershire sauce, garlic, bay leaves, onion, salt, sugar, pepper, paprika, and allspice. Cover and simmer 1 1/2 hours. Remove bay leaves and garlic clove. Add carrots and celery. Cover and cook 30 to 40 minutes longer. To thicken gravy, remove 2 cups hot liquid. Using a separate bowl, combine 1/4 cup water and cornstarch until smooth. Mix with a little hot liquid and return mixture to pot. Stir and cook until bubbly.

Buttermilk Buckwheat Pancakes

Buttermilk Buckwheat Pancakes
Buttermilk Buckwheat Pancakes. Buttermilk Buckwheat Pancakes. Try saying that three times fast haha! So do you want to know what I love about this recipe? It's so easy. It totally reminds me of the good ol' gluten eating days where there was no need to blend flours and no gums to bind the ingredients. All you need is whole grain buckwheat flour. Now, don't be concerned. Buckwheat is not a wheat, nor is it related to the gluten filled grain. It's actually the flour from a grass seed. Anyway, your batter might be thin at first, but be patient, keep stirring, and it will thicken :)


Can't wait to make them? Well, you SHOULD! So here is the recipe so you can:
Buckwheat Pancakes
1 cup buckwheat flour
1 teaspoon baking powder
2 tablespoons sugar
salt
1 egg, beaten
1 cup buttermilk
2 tablespoons melted butter
Heat a large skillet to medium and grease well. Then mix the dry ingredients together. Add egg, milk and butter, mixing well after each addition. Pour 1/4 cup batter onto hot griddle. Cook until bubbles break on surface then carefully flip over and cook another minute or two.

Friday, November 2, 2012

2012 Extreme Horseman's Challenge

Hi there everyone! I finally had a wee bit of downtime and I thought I would share with you a recap of this year's Extreme competitions. I was lucky enough this year to be able to enter and compete in all 6 of the season's competitions. That being said, this years series ended in a lovely belt buckle to the overall winner in each division. Now the divisions go from Youth, Green, Entry, Open, and then Extreme with Extreme obviously being the most challenging AND the most fun, I might add haha!

Now, how the competitions work is there are 20 or so obstacles scattered throughout a HUGE outdoor facility. The goal of the race is to A. Be the fastest through the course and get the most speed points and B. to display the best riding skills AND horsemanship at each individually judged obstacle. So ya, you might be fast, but can you ride well and will your horse willingly do what's asked? I love these competitions so much. They have so many different things they throw at you and a lot of them, you just CAN'T train for. So it really boils down to how well you can communicate to your horse and how much your horse trusts you. What cracks me up, is my little grey horse enjoys competing as much as I do. It's uncanny because he KNOWS when it's go time and he gives me everything he's got when we are racing. It doesn't matter how big the jump or how scary the obstacle, I just have to SHOW him where he needs to go and he does it. There is a re-occurring joke at the center that Smokey and I are crazy and they should open a new category just for us and call it the Kamikaze division. Kinda makes me laugh since he and I are the smallest to compete in the Extreme division. Now, don't get me wrong,  I LOVE these competitions, but I get SO intimidated....there aren't too many women who enter in extreme and seeing all the big time cowboys on their nice big quarter horses really is unsettling. I show up with my humble little truck and very old trailer and pull out my small $50 horse that no one wanted and it's enough to get my heart pumping a bit.

Another challenging piece of the competition is TRYING to memorize the course map. Each competitor gets a map of the course and can walk the course the night before. Now, for people that have a few more brain cells firing in their noggin, this is easy for them. Me.......ya, not so much lol! Honestly, the hardest part of these competitions is trying to remember what obstacle comes next, where I'm supposed to go, how I am supposed to do it, all while my horse is going mach 50 on the course. I will admit that I have.....ahem.....been known to totally miss entire sections of obstacles....or.....ahem.....do them in the wrong order. One of the judges joked (while me and the other competitors were doing a course walk) that they wanted to make the races challenging, not only for the horse, but for the rider as well.... So THIS year I made a big effort on really working on doing my best to memorize the course map. What has helped is that I started typing up the description of each obstacle AND making a small laminated copy of the course map. So that way, IF I forgot where to go while competing, I could hurry and pull it out and put it back in a jiffy :)

So as far as the obstacles go, there has been some real fun and a few difficult ones. My favorites are always, of course, the jumps. I swear my little horse is a stadium jumper at heart. Every picture we have of him jumping he has such great form, his ears are pricked forward, and it really looks like he is enjoying himself. Last year, they had a large log that was set OUT of a recessed water obstacle that you got 5 bonus points if you jumped OUT of the water OVER the log. It was one of the only instances I held the saddle horn and let the rein loose and told my horse "Smoke, balls in your court buddy, get us over that thing". I was so excited that one of the photographers caught us right as we were leaping over the log :) Only one other competitor attempted the log jump and his horse got high centered (both he and his horse were ok ;). There were some funny obstacles they through in as well. One was to sort ONE goat from a herd of sheep AND goats. Well, ONE of the competitors just jumped off his horse, grabbed a goat by the horn, and placed it in the correct pen. Which he got 4 points for being creative! Seeeeeee, that's why these competitions are SO fun! You can think outside of the box. Not to brag though....but Smokey and I got a SHEEP out and penned it WHILE I was still mounted hehehe. Now, the obstacle that I just couldn't master (which ALWAYS lost me points) is the pony express run. It was a spot where you got 5 balloons and while at a gallop, you had to try and hit 3 targets. Ya, ummmm I took big fat ZERO's on that one.....I didn't even come within 1 foot of the targets and most of the time clutz of the year me, would end up dropping all the balloons BEFORE I even had a chance to hit a target lol! Another obstacle that I THOUGHT would give my horse a difficult time was a freshly slaughtered animal skin. I don't hunt and Smokey has never been around anything deceased. The goal of the obstacle was to place the animal skin on the neck of your horse, gallop to a point, and drop it off. Well, they threw in a loud obnoxious coyote call RIGHT when you went to pick the skin up. Thankfully, it didn't phase Smoke one bit. Some other fun things they have done is making you hold a big bouquet of balloons while going over a bunch of scattered telephone poles. So you had to have good balance to jump over those things WHILE holding a bunch of balloons. Then another was to push a big inflated ball in between two goal posts in the water. One of my favorites was on the last competition where you had to ride bareback for a good 100 yards or more at a gallop, dismount, saddle as quickly as you could, then continue the race.

All in all it was a great year full of fun, friends, and competition. I really enjoyed getting to know the other competitors. Once we all got to know each other, it was fun to throw out some friendly banter and jabs at each other. I would joke that they were on horses slow as molasses, and they would joke about me getting lost. Oh speaking of getting lost. This is a funny story I have to share.....So the competition in September was one of Smokey and my best runs. He literally FLEW and I swear it was our fastest time. I also didn't get lost and I could remember my obstacles and the order I was supposed to do them. SOOOooooOOOOoo I do my last obstacle and Smokey and I start hauling balls to the finish line when all the competitors are yelling my name and pointing. So I freak out thinking I'm going the wrong way to the finish line. So I pull Smokey into a big circle to try and find where I'm supposed to go. Well, everyone is STILL pointing and yelling at me and I can't figure out WHERE I'm supposed to FINISH the darned race at. I literally did 4 huge circles and wasted 30 seconds of my race time trying to find the danged finish line......SO ya, after that, NO one let me forget that the ditzy blonde couldn't find the finish lol! So what's even more funny is Smokey and I STILL had the fastest time even with the 30 extra seconds lol!

So the results of this year's races? Smoke and I won the year end buckle :) We won 4 of the six, tied for second place once (since I had the slower time by 17 seconds, I took second), and came in second once. I was so proud of my little horse. He really is one of those "once in a lifetime" horses and I'm so glad I nabbed him up when no one else would. He might be small, but don't tell him that. He beats out horses double his size. It was such a fun year and Smokey and I enjoyed every bit of it. I will say, I'm glad the season is over and Smokey and I can relax....until next year that is ;)

So here are some pictures and a video of this year's races. Thanks for taking the time to read my little blog!
Chit chatting with a competitor before the race

Heading towards the next obstacle

Going over the jump and landing on a steep hill. I wish you could see how steep our landing was....this was certainly a tricky one.
Those floating milk jugs could be pretty skeeeeery ;)


 Smokey launching us over a log and into the water


Coming down the "three step"

Here is another shot of us coming down the steps


 Easy Smoke!

 Heading towards the finish line (didn't get lost this time hahaha!)


Flying through the water obstacle :)

Ok, this picture wasn't taken THIS year, it was the crazy big jump we did last year that I mentioned earlier. I had to share it since it is pretty much the biggest obstacle/jump we have done together.

Here is the link to the video of us sorting.....or at least ATTEMPTING to sort goats hahaha!
Sorting Goats 

Aaaaaaand here is dorky me with my buckle. Don't mind the pink hair, it was part of the costume from earlier ;) The last race we could all dress up :)


Lastly, the belt buckle :) 

Monday, October 29, 2012

Hawiian Haystacks....GLUTEN free style


Hawaiian Haystacks
 
Yes, good ol' Americana style dinner and YES YOU can make it! It's easy. Almost as easy as opening up a can of cream of chicken soup. Well, ALMOST that easy ;) If your family is like my family it would be a favorite meal for Mom to make. It's a mom favorite because there is really minimal preparation and it's a great way to get your family to eat some veggies that they normally wouldn't.


So here is the recipe rundown:
 
Gluten Free Hawiiain Haystacks
 
3 tablespoons butter
3-5 tablespoons sweet rice flour
1/2 cup diced onions
1/2 cup milk
1 1/2 cup chicken broth or stock
1-2 tablespoons butter or oil
2 chicken breasts or chicken thighs
salt and pepper to taste
 
Now for the fun stuff:
cooked rice
pineapple chunks
shredded cheese
sliced black olives
chopped tomatoes
diced green onions
diced bell peppers (any color)
for the crunchy stuff....gluten free Fritos :)
 
 
In a medium sized saucepan on medium heat melt the butter and saute onions until tender. Add roughly 3 tablespoons sweet rice flour and whisk until smooth. Slowly add the milk whisking until smooth. Keep whisking until sauce thickens to a paste (about 1-2 minutes). Then slowly whisk in the chicken broth and bring to a simmer. Keep simmering until sauce begins to thicken. Add more sweet rice flour if needed to thicken to a gravy like consistency. Once sauce reaches the the desired consistency, lower heat to low to keep warm. Then in a medium sized fry pan, warm up a little butter or oil then cook the cubed chicken. Once cooked, add to the chicken sauce.
 
To serve, place rice on a plate then top with chicken and sauce then add your desired toppings. Enjoy!


Thursday, October 18, 2012

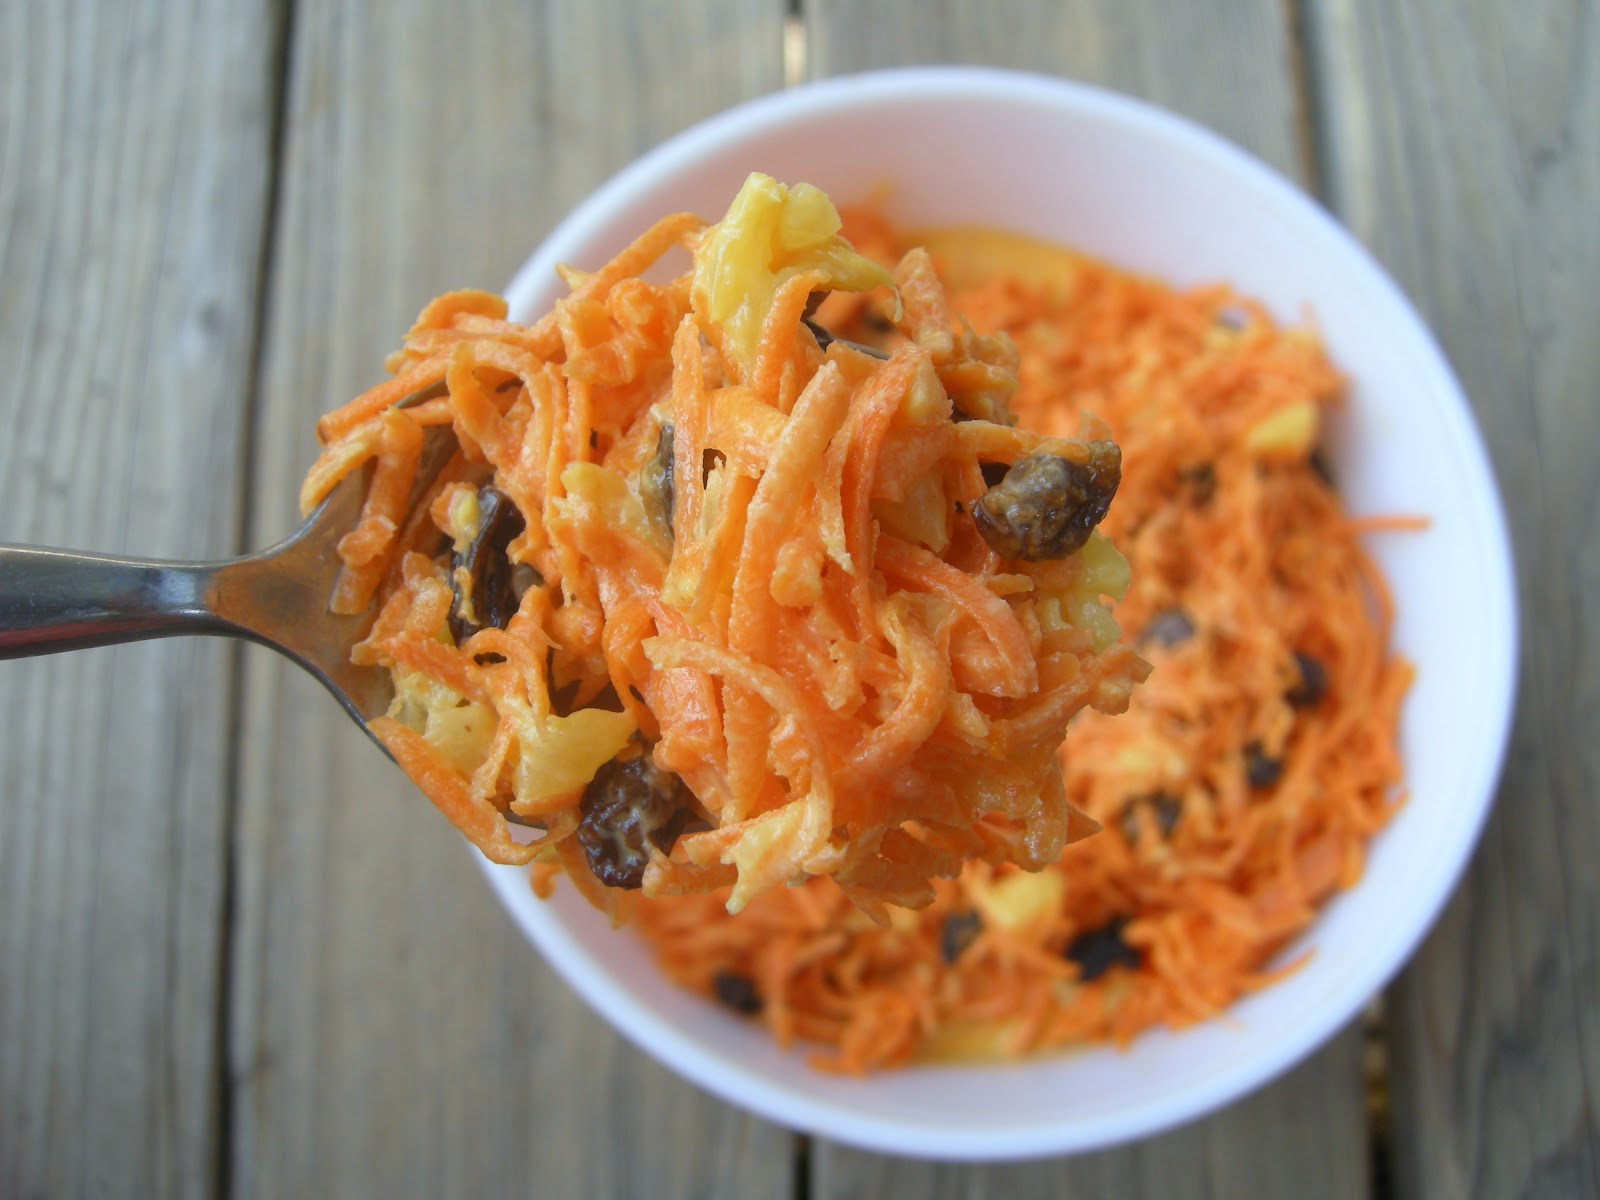
Carrot Salad

Carrot Salad

This one is a classic, that's for sure .It's simple, easy, and a perfect side to bring to share with your friends and family.
Now, the sauce can TEND to get runny and if you are a motivated soul, go ahead and pile your shredded carrots on some kitchen towels or paper towels. Also, do not be afraid of the amount of salt. Just trust me. Be brave. Measure out the full 1/2 teaspoon and mix it in. Now pat yourself on the back :) Also, you can add either crushed pineapple or pineapple chunks. Me? Well, I'm not a crushed sort of girl. I like my chunks....but for this recipe I like to roughly chop up the pineapple chunks. Now, if your a chunk person, then by all means, just add the chunks. Same if your a crushed sort of person. Really, crushed, chunked, it's all up to you.


Carrot Salad

1 lb shredded carrots
1/3 cup raisins
1/3 cup pineapple chunks (drained and lightly chopped)

For the dressing

2 tablespoons lemon juice
1/4 cup greek yogurt
1/4 cup mayo
3 tablespoons sugar
1/2 teaspoon salt

Shred carrots and place on paper towels to dry. Meanwhile, mix together the sauce ingredients and prepare pineapple and raisins. When sauce is mixed, toss the carrots, raisins, pineapple, and dressing in a large bowl. Allow to chill for at least 20 minutes prior to serving.