Tuesday, May 31, 2011

Pao de Queijo or Brazilian Cheese Bread

Anyone ever eaten at Rodizio's or Braza Grill? Or any authentic Brazilian joint for that matter? Reason I ask is because those nommy grilled meat places introduced me to another wonderful and might I add...NATURALLY gluten free item. Pao de queijo. They are the most tasty and nibble worthy little bites. The texture is slightly crunchy on the outside, then warm, chewy, and nummy on the inside. Another thing...they are really easy to make. You don't have to worry about flour blending either. Just use some good ol' tapioca flour. 

Another great thing is you can freeze your little dough balls and bake up however many you want. I'm tellin ya, your going to love these. Your pocket book will also love the fact that they are SO much cheaper than popping the $$ for gluten free rolls or bread. 

Are you ready to try them out? 

Well, here is how to create these munchworthy little bites.

Start out by getting yourself some granulated cojitas cheese. I found this nice big bag at Winco, but you can get them at any south American market or most large grocery stores.  Now...you CAN use Kraft Parmesan cheese. It will work just as good as the Cojita cheese (just lacks the authentic flavor)

Preheat oven to 350 and grease two baking sheets. Then in a saucepan bring the following ingredients to a boil on medium heat stirring once in a while:

1/2 cup whole milk
1/2 cup water
1/4 heaping teaspoon salt (you want just a bit more than 1/4 teaspoon)
1/4 cup canola oil


Once the liquid ingredients are brought to a boil, move pan off heat and measure out 2 1/2 - 2 3/4 cups tapioca flour. You are going to eyeball the consistency and add enough flour until the dough becomes pliable and can be kneaded with your fingers. Now be patient...at first your dough will be a bit sticky. The more you stir it, the more it will thicken up. It will then begin to become a nice ball of dough.

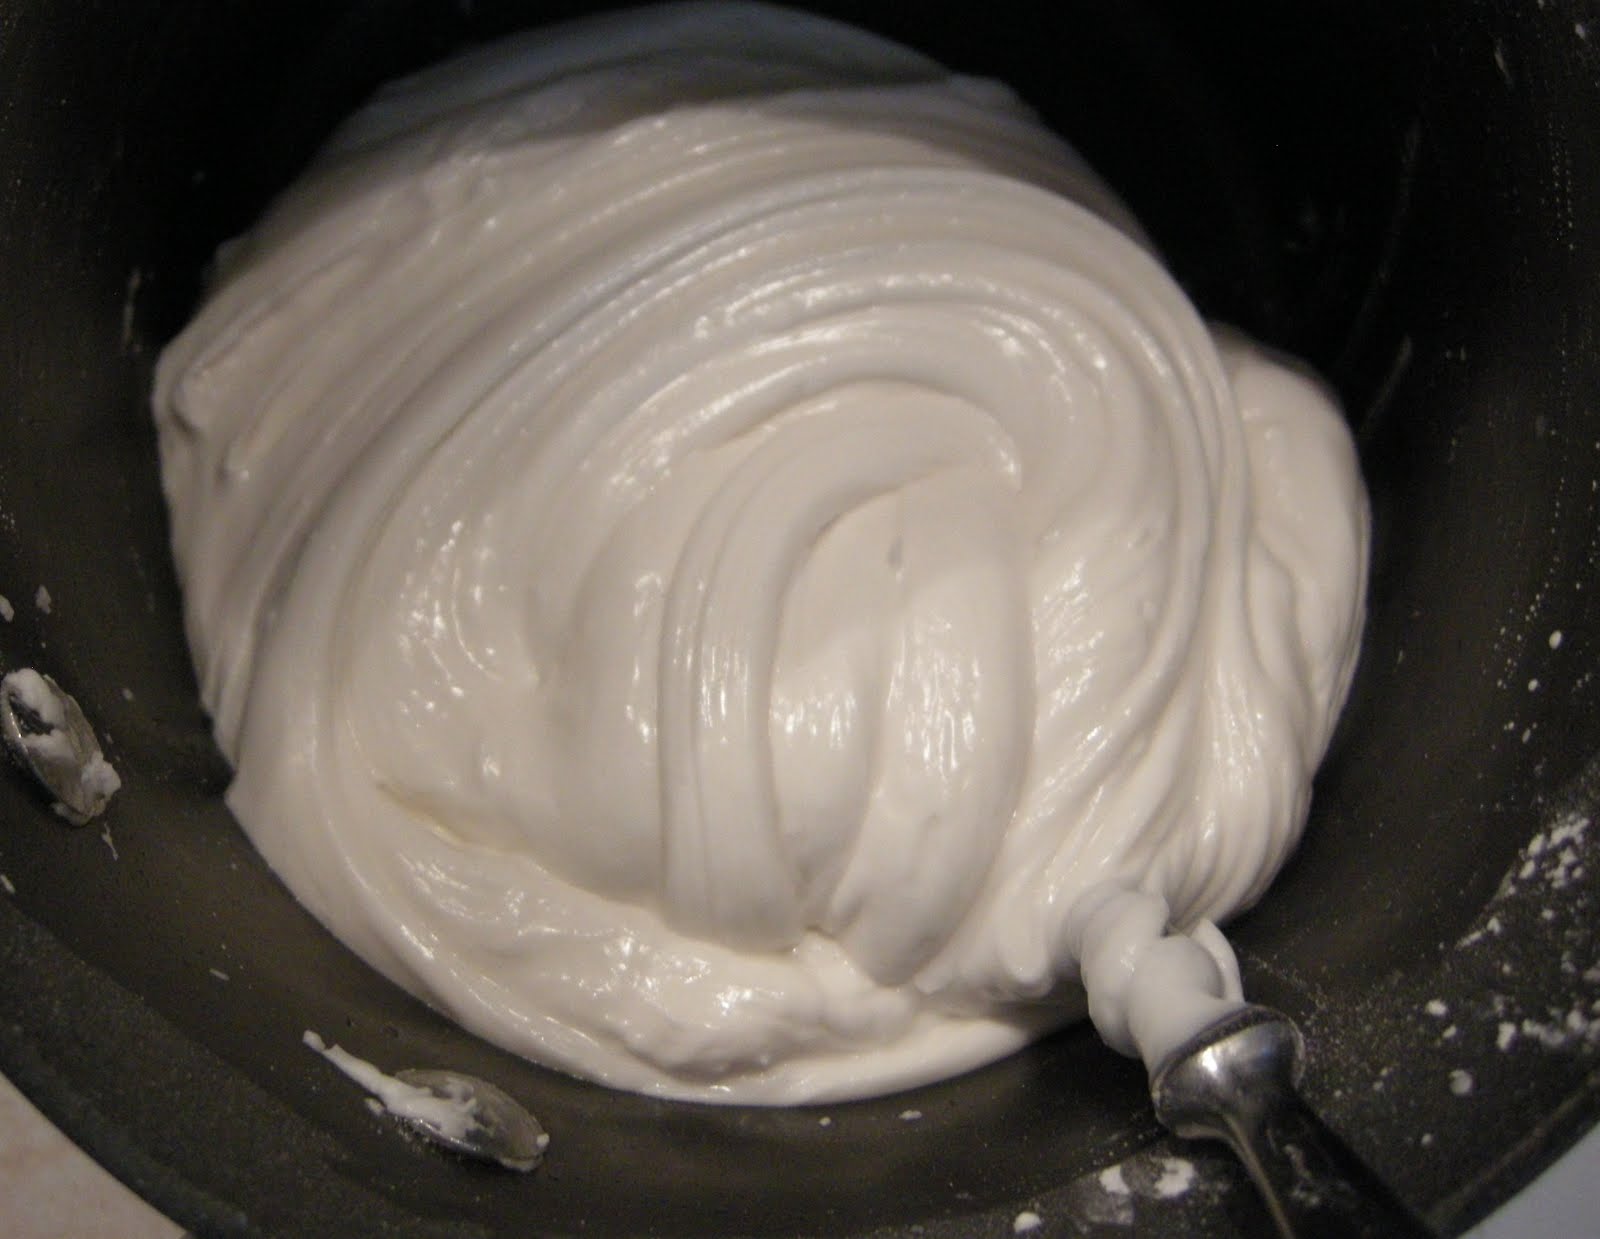
Now, whisk up 1 1/2 eggs. I know...1 1/2...but really, that's all you need. Then, stir the eggs into your dough mixture.Now stir in 4 ounces of the Cojita cheese and set aside. 


Now add about 1-2 ounces additional cheese in a bowl and place by your greased baking sheets. Take a bit of dough and roll it into a 1" ball then dip it into the cheese. Place it on your baking sheet and repeat. This recipe will fill up both baking sheets. 

How awesome are these little babies?

Now you don't HAVE to top them with the cojita cheese, BUT it adds the toasted spots that make them look even more scrumptious. 

Pao de Queijo

1/2 cup whole milk
1/2 cup water
1/4 cup canola oil
1/4 heaping teaspoon salt
2 1/2-3/4 cups tapioca flour
1 1/2 large eggs beaten
4 ounces granulated Cojita cheese plus additional to top dough balls (or granulated Parmesan cheese)
1-2 ounces extra Cojita cheese to dip dough balls in

Preheat oven to 350 degrees and grease 2 baking sheets. In a saucepan bring the milk, water, oil, and salt to a boil. Remove pan from heat and set aside. Add the flour in increments stirring constantly until the dough becomes pliable and can be kneaded with hands. Be patient, the more you stir the more solid the dough will become. Only add enough flour needed until dough reaches desired consistency. Stir in the beaten eggs then the 4 ounces of Cojita cheese. Stir until dough becomes thick and can be molded. Add additional tapioca flour if needed. Roll dough into 1" balls and dip the tops into the extra cheese. Place on the greased baking sheets and bake for 20-25 minutes or until cheese becomes golden brown. 

Can be served warm or cool. Dough balls can also be frozen and baked at a later time. 

ENJOY!

This recipe is featured on the Gluten Free Homeaker's Gluten Free Wednesdays

Monday, May 30, 2011

Cucumber Tomato Salad

Hi there and happy Memorial Day to my cyber friends. I sure hope everyone had a great weekend full of fun, family, and of course...food. We hosted a little shin dig at our place for my husband's sweet family and introduced them into the wonderful world of gluten free eats. The fun thing about this salad is it's easy, simple ingredients, and naturally gluten free. With just a few simple items, you can have a tasty and fresh salad that goes wonderfully with your summer time BBQ's.

To create this salad, mix together 1/4 cup olive oil, 3 tablespoons red wine vinegar, 1/2 teaspoon oregano, and 1/4 heaping teaspoon of salt. Then peel and chop 3 large cucumbers. Dice up 3-4 roma tomatoes, then half 1 cups worth of olives, and measure about 1 cup feta cheese. Toss ingredients together in a large salad bowl then TADA! Your done :) That's it. Told you it was easy peasy :) Now if you wanted, you CAN throw in 1 1/2 cup cooked noodles. Me myself, I think this salad is tasty just the way it is without adding the expensive GF noodles.

Anyway, enjoy and happy Monday to y'all!


Cucumber Tomato Summer Salad

3 large cucumbers peeled and diced
3-4 diced roma tomatoes
1 cup black olives cut in half
1 cup feta cheese

For the dressing
1/4 cup olive oil
3 tablespoons red wine vinegar
1/2 teaspoon oregano
1/4 heaping teaspoon salt

Mix dressing ingredients together and set aside. Toss together salad ingredients then pour dressing over and mix well.

Wednesday, May 25, 2011

Slacker Jill finally gets on the ball.....

Ya, I know, I've been slacking lately. Now to my defense...my dear sweet husband decided to crash and burn on his dirt bike. That being said, I have now become the full time employee for our Realtor Sign installing business. SOooooOooo...that means I've been driving from one end of UT to the other putting in signs from sun up to sun down. Not a lot of time left for creating and sharing scrumptious gluten free bites.

Now that I have that off my chest. I MUST share this recipe with you. I will say, it has an interesting ingredient, but I assure you...if you try it...you will like it ;) Wanna know what that secret ingredient is???

Cantaloupe. Yep. Pureed cantaloupe. That lovely peach fleshed melon that is ever so popular at farmer's markets or in your garden. I came up with this recipe a while back to use up the bounteous crop my father grew. The pureed fruit also adds moistness and cuts out most of the oil. 

Ok, so, here be the Cantaloupe Ginger Muffins. Oh and yes...I HAD to add ginger in there...LOVE that stuff ;)

Start out by preheating your oven to 350 and lining 12 muffin tins with muffin papers. Then begin peeling and cubing your cantaloupe. Place a handful or two in the blender and puree. You will want a total of 1 cup pureed melon. So just keep adding and blending until you have that amount.

Next sift together the following dry ingredients:

1/2 cup brown rice flour
1/2 cup sweet rice flour
1/2 cup tapioca flour
1/2 teaspoon salt
1/2 teaspoon baking soda
3/4 teaspoon cinnamon
1/2 teaspoon ginger
Set aside.
Now cream together 2 eggs, 1/2 cup melted butter or margarine, 1/2 cup white sugar, 1/2 brown sugar, 1 teaspoon vanilla extract.

The last step is to alternate adding a bit of the dry ingredients and the pureed cantaloupe. Add until all ingredients are incorporated. Don't fret, the batter will be quite liquidy.

For the topping, add together the following ingredients in a bowl:

1 1/2 - 2 tablespoons butter
1 1/2 tablespoons brown rice flour
1 1/2 tablespoons sweet rice flour
2 tablespoons brown sugar
1/4 teaspoon cinnamon
1/4 teaspoon ginger 

Using a fork, cut the butter into the dry ingredients until you have a nice crumbly texture. Using your fingers sprinkle the topping over the unbaked muffins. Place in the oven and bake for 10-15 minutes or until an inserted toothpick comes out clean :)

That my friends...is how you make cantaloupe ginger muffins gluten free :) Oh and if your wondering why there is no xanthun gum...well, it's because this recipe does not need it. I promise. The muffins hold together nicely all by their little selves :)


Don't they look scrumptious? Well....they are. Don't take my word for it. Get yourself some melon and make em for yourself ;)

Thursday, May 19, 2011

Quinoa Corn and Carrots

Yes, I know....there be corn in this here recipe. I figured, my body is a rarity by not liking it and as this dish was made for my grandparents, I figured I would share it. Plus, when I make it for myself, I just opt to not include the cobbed vegetable and add something like peas, red bell peppers, you get the picture.

Anyway, your going to love how easy this side dish is put together and your going to enjoy the way it tastes EVEN better :) Your body will be enjoying all the wonderful nutrients the quinoa and veggies will provide.

Now to start out, shred yourself 1/2 cup's worth of carrots. I'm sure you all have wonderfully updated kitchens that include a food processor that will shred them up in a jiffy. Me...I use my Great Grandma's old food mill. I just can't help thinking about her each time I pull it out. She truly is a woman I would love to be just like. I will have to dedicate a post to her one of these days.


Now take an ear of fresh corn and cut off the kernels.

Now take one big clove of garlic and mash it into smitherines....


Using your rice cooker, pour in 1 cup water and 1 cup chicken or veggie broth and 1 cup rinsed quinoa. Dash of salt, 1 tablespoon butter, and the carrots/corn/garlic.

Now turn your rice cooker on.

That's it :)

The tasty little side dish will be ready in about 20-25 minutes.


Quinoa, Carrots, and Corn

1 cup water
1 cup chicken or vegetable broth
1 cup rinsed quinoa
1 tablespoon butter
1/2 cup shredded carrots
1 ear fresh corn (kernels removed)
1 large garlic clove minced
dash of salt

Place all ingredients in a rice cooker and cook for 20-25 minutes.

Tuesday, May 17, 2011

Oven Roasted Asparagus

Hello everyone! This post is short, but in NO way lacking in flavor. Plus....it's another quick and easy dish to satisfy your vegetable cravings or to be a tasty side you can throw together in a jiffy. Plus, most kitchens should have all of the ingredients needed.

Your gonna love how this all gets put together. Start out by preheating your oven to 400 then lining a baking sheet with foil. Next chop off the bottoms of 1 pound asparagus. Now set your asparagus on the foil lined baking sheet and drizzle about 3-4 tablespoons olive oil all over and sprinkle with coarse salt and pepper. Next, crush up 2 cloves garlic (or use 1 teaspoon garlic powder) and sprinkle over the tasty green stalks. Finally, take 2-3 tablespoons lemon juice and drizzle all over. The next step will take you back to your elementary school roots. Remember making those clay snakes you used to make by rolling the clay back and forth? Well...get your hands and roll those spears back and forth to cover them all up with those savory ingredients.

Now place the baking sheet in the oven on the top rack and back 15ish minutes or until the asparagus is tender and can be easily pierced by a fork.

Really...that's all there is too it. I am telling you...oven roasted veggies are the BEST way to eat them. Now, I do enjoy them steamed once in a while, but man....the flavors that an oven can bring out just tickles my pickle. Plus, you can get those creative juices flowing and roast just about any veggie. The concept is pretty much the same for them all. A little bit of olive oil or vinegar, salt, pepper, and roast them at 400 until they reach the desired tenderness.

Don't they look scrumptious????


Oven Roasted Asparagus

1 lb fresh asparagus (bottoms removed)
3-4 tablespoons olive oil
2-3 tablespoons lemon juice
2 crushed garlic cloves
salt and pepper

Preheat your oven to 400 and line a baking sheet with foil. Spread asparagus on the sheet then drizzle all liquid ingredients on top. Sprinkle the garlic and salt/pepper. Place on the top rack of your oven and bake for 15 or so minutes or until tender and easily pierced by a fork.

This recipe is featured on The Gluten Free Homeaker's Gluten Free Wednesdays

Thursday, May 12, 2011

Ham and Greens Soup

Hello everyone. Happy late Mother's Day to all of you. I had such a wonderful weekend of family and flowers. Speaking of flowers, I thought I would share a couple pics of some of my flowering bulbs. Now, I did use my cell phone, so I apologize if they are not the best quality.


We have had quite the lack of sunshine and warm weather here in Utah (to say the least) and so my flowers are pretty behind. Not that I am complaining. I am enjoying the daffodils and tulips.

Anyway, speaking of Mother's Day, we had a lovely Honey Baked Ham for dinner...but are now left with quite a bit of leftovers. In the past, I had become quite bored with using the leftovers for fried ham and eggs....Soooooo I played around a bit and found a wonderful recipe to use up the ham in quite the tasty spring soup.

You can really use just about any amount of leftover spiral cut ham. Honey Baked is gluten free...just make sure that the type you use is also free of the icky gluten stuff.

 Depending on how much I have left over, the amount I use is anywhere from 1-2 cups diced into pieces. Then take 2 tablespoons olive oil and heat it up in a large skillet. While the oil is warming, dice up 1/2 cup onion. Add the ham, onion, and 1 1/2 teaspoons bottled garlic or 1-2 large minced garlic cloves. Saute over medium high heat for 5 or so minutes until the onion is tender and the ham starts to get a bit browned and crispy.

Now take a big bunch of collard greens.


And roughly chop it up, discarding the stems.


Once the onion, ham, and garlic are done throw in the greens and cook them (stirring constantly) stirring constantly for about 1 minute until the greens are wilted and reduced in size.


Now take a can of black eye peas....


Rinse em and drain em....


Then pour 2-3 cups chicken broth (this will depend on how much ham you have and how brothy you like your soup and add the black eyed peas.

TADA!


Ham and Greens Soup Recipe

2 tablespoons olive oil
1-2 cups chopped left over spiral cut ham cut into bite sized pieces
1/2 cup diced onion
1 1/2 teaspoon bottled garlic or 1-2 large minced garlic cloves
2 cups roughly chopped collard greens
1 can black eyed peas drained and rinsed
2-3 cups chicken broth
salt and pepper to taste

In a large skillet warm up olive oil. Add ham, onion, garlic and saute over medium high heat until ham is browned and starts to get crispy. Lower heat to medium and add the greens stirring constantly. Cook for about 1 minute when the greens start to wilt and are reduced in size. Pour in broth and stir in black eyed peas.


Monday, May 9, 2011

It's time for muffins! Gluten free, full of flavor, and oh so scrumptious.

Oh yes....normal food. Hello textures, solids, flavors. I am most definitely excited for this post. More for the fact that my chipmunk cheeks are diminished and I no longer resemble a butternut squash head. I am donning some nice blue chops, but thankfully I am able to eat more normal foods. Which brings me to this post. I really wanted a muffin. Mostly because of a new fun website donning tried and true bed and breakfast eats. So I thought it would be fun to de-glutify one of the fun recipes that I found. Now....I REALLY wanted to make the pralines and pecan muffin, but alas....I could not find one trace of pecans anywhere in my house. I am sure they were gobbled up in a manic mode of hunger. Ok, so besides the fact that I was lacking in nuts, I did realize I had coconut and ripened bananas. The perfect combo for the banana coconut muffin recipe.

So here is the recipe for gluten free banana coconut muffins.

2/3 cups brown rice flour
2/3 cups sweet rice flour
1/3 cup tapioca flour
1 teaspoon xanthun gum
1/4 cup sugar
1/4 cup brown sugar
2 teaspoons baking powder
1/4 teaspoon salt
2 bananas mashed into smitherines
1 cup shredded coconut
1/2 cup milk
3 tablespoons melted margarine

Topping

1/2 cup shredded coconut
2 tablespoons melted margarine
2 tablespoons brown sugar
1/4 teaspoon cinnamon

Preheat oven to 375 and line 12 muffin tin cups with paper liners. Then in a large bowl sift together all dry ingredients. Then stir in coconut and mashed bananas. Blend in the milk then fill the muffin cups 3/4 of the way full with the muffin batter. Mix together topping ingredients then with fingers, sprinkle the topping mixture on each muffin. Bake for 25 minutes.


***Helpful note to my devoted readers. When baking the very tasty batch of muffins...don't jump in the shower and forget they are baking. Otherwise, you will need to pick off most of the delectable coconut topping since it will be nicely BLACKENED in the oven***

Thursday, May 5, 2011

Creamy Roasted Cauliflower Soup

Yes, this is another creamy soup recipe. Thankfully it is not lacking on the flavor and it is quite easy to throw together. Meaning, if a doped up swollen mouthed Jill can do it, ANYONE can :) I apologize for the lack of chatiness today. The totally awesome pain meds are doing quite a number on me today and I swear there are three computer screens floating about.


Ok, so just so everyone knows, I love roasted vegetables. I will happily gobble up just about any sort of vegetable...even more so if it's been cooked in the oven to a roasty toasty perfection. That being said, I figured....since my mouth is somewhat out of commission and I can't roast up any vegetable side dishes, why not roast them and make a soup instead?


So after searching through my refrigerator I found the perfect base for my soup, a lovely head of cauliflower. I chopped it up into 2" pieces, drizzled about 2-3 tablespoons of olive oil on the florets, then gave them a good salting and through them in the oven preheated to 400 on the top rack. The roasting took all of 15-20 minutes (I took them out when they started to brown and when a fork easily pierced them. I also placed 3 nice sized garlic cloves in tin foil, drizzled it with olive oil, then roasted it along with the cauliflower.


While the caulys were baking, I melted 2 tablespoons butter, 2 tablespoons sherry, and 1/3 cup diced onion on medium heat. After about 5 or so minutes (when the onion became tender and translucent) I added 2 tablespoons sweet rice flour and made a roux. I then slowly stirred in 3 cups chicken broth and 1 cup milk and brought it to a boil. Then lowered the heat and simmered until the soup base thickens up. At that point I added salt to taste and a dash of pepper.


When the cauliflower and garlic were finished cooking I transferred them into a blender and poured in the soup base. I gave it a good puree'ing until it was a nice smooth consistency (perfect for my swollen and achey mouth :)


I added a generous amount of cracked pepper and was very satisfied with my wisdom toothless friendly lunch :) Now, even if you don't have a black and blue swollen face, you might want to try this recipe out :) It's an easy way to get in your veggies and you might just like it ;)


Recipe

1 head cauliflower cut into 2" pieces
3 garlic cloves
1/4 cup olive oil
1/3 cup onion
2 tablespoons sherry
2 tablespoons butter
2 tablespoons sweet rice flour
1 cup milk
3 cups chicken broth
salt and pepper to taste

Preheat oven to 400. Drizzle 3 tablespoons olive oil on cauliflower florets and spread on a baking sheet. Drizzle remaining tablespoon olive oil on the garlic then wrap the cloves in tinfoil. Place cauliflower and garlic in the oven on the top rack. Roast for 15-20 minutes or until cauliflower is browned and a fork easily penetrates. Meanwhile, add the butter, sherry, and onions in a saucepan and cook on medium heat. After about 5 or so minutes when the onions are tender stir in the sweet rice flour. Cook for another minute then slowly stir in the milk and broth. Bring to a boil, then reduce heat to a simmer stirring constantly. Turn off burner when soup reaches desired thickness. Transfer into a blender along with the oven roasted cauliflower and garlic. Blend until smooth. Add salt and pepper to taste.

Wednesday, May 4, 2011

Creamy Avacado Cucumber Soup

Well...I lied. Here I am with cheeks the size of watermelons (maybe not watermelons, but that description was taken from my daughter) or the face of a butternut squash (Dear Husband's description). So in desperation to find something for lunch that was cold, filling, and NOT sweet I did some searching on the computer for SOME sort of cold soup. That being said. I have never really tried a cold savory soup. Me being a soup lover, I guess I need to be adventurous and start trying the many different versions soup has to offer. Now since I have absolutely no chilled soup recipes I relied on good ol' google to get me started on some chilled soup recipes and ideas. Doing so, I found many unique and some interesting food combinations that could be presented in a some form or the other as soup. One of them caught my attention that seemed like it would offer the wonderful combination of creamy and cool. Of course the biggest persuasion is that I knew I had those ingredients on hand and I didn't have to send my sweet hubby for a grocery run. What sort of combination am I talking about? Well it would be avocados and cucumbers. It also has turned out to be a lifesaver as the preparation and creation of this little number is less than a jiffy. Now just exactly how long is less than a jiffy?  Well it's a wee bit longer than likety split but not quite as long as two shakes of your fist ;)

Now that we know just exactly how long this little chilled soup number will take to make, here is how to make your wisdom teeth removal friendly lunch. Take the following ingredients and place them in a blender:

2 medium peeled cucumbers
2 avocados (innards only. minus the pit)
1 small garlic clove cut into sections
juice of 1-2 limes (the amount should be roughly 1/4 cup give or take)
2 tablespoons sour cream
2 tablespoons minced cilantro
salt and pepper to taste

Now give all of that a good blending until it's nice and smooth. Top with a bit of extra sour cream, sprinkle of freshly minced cilantro, and a spray or two of lime juice to up the zing factor.

Yummy in my tummy.


Now I am thinking instead of the sour cream, next time, I want to use some plain goat milk yogurt or greek yogurt. I think the slight tartness yogurt has will be a welcome accompaniment. I will keep you posted.

Sunday, May 1, 2011

Gluten Free Taco Pizza

So this is post #2 of our 5th of May foodie celebration. I did save the best for last :) Now whoever decided to mix do a little mixation of italian and mexican foods my hats off to them. The invention of the taco pizza has got to be one ov the best cuisine mashups. EVER.


To start out. Make some tasty seasoned ground meat to top on your lovely little pizza. I myself like ground turkey, but I know most people will want to make thier taco pizza's with ground beef ;) Take 1/4 lb ground meat of your choice, 2 tablespoons diced green chilies, 2 tablespoons tomato sauce, 1/4 teaspoon chili powder, and 1/2 teaspoon ground cumin and brown it all in a medium skillet on medium heat.


This is a thin crust type that has a bit of a crunch and a bit of a chew. It's also very very easy. One thing I have found when working on gluten free doughs is that there is no worry of over working your dough or the pesky kneading and proofing of glutified versions. So all you need to do is first preheat your oven to 450 then generously dust a pizza pan with sweet rice flour. Then in a glass measuring cup mix 2 1/4 yeast with 3/4 cup hot water and 1/4 cup sugar. Allow to proof for at least 7-8 minutes.  Meanwhile blend together 1 1/4 cup white rice flour, 1/4 cup and 3 tablespoons tapioca flour, and 1/4 cup and 3 tablespoons potato starch, 1/2 teaspoon salt, and 1/2 xanthun gum. When your yeast has proofed and has doubled in size slowly pour into the dry ingredients stirring constantly. Your dough will resemble more of a batter than a dough. Not to fret. Keep stirring for about a minute. It will soon begin to thicken and can be handled by hand. Once the dough gets to that point, dust your fingers with more sweet rice flour then press your dough into the pizza pan. No need to roll it out, no need to toss it in the air, just get grabby and work that dough into as round of a pie as possible (approximately 1/4" in thickness). Now brush the edges with olive oil and set aside.


Now take a can of black beans, drain, and rinse. Spoon them into a blender, add 3 tablespoons chicken broth, 1/2 teaspoon cumin, and 1/4 teaspoon paprika. Give it a good blending until it is nice and smoothable.


Using a large spoon spread the bean blend on your pizza crust. Then top the beans with 1 cup of cheddar and 1 cup mozzarella cheese. Sprinkle the ground meat on top then add one medium diced tomato, 1/4 cup diced red onion (optional), and 1/4 cup sliced olives.


Place in the oven and bake for 15 minutes and your done! Dash some taco sauce or tobasco and your tastebuds will be singing hallalua.


Gluten Free Taco Pizza

For the crust

2 1/4 teaspoon yeast
1/4 teaspoon sugar
3/4 cup hot water
1 1/4 cup white rice flour
1/4 cup and 3 tablespoons potato starch
1/4 cup pand 3 tablespoons tapioca flour
1/2 teaspoon salt
1/2 teaspoon xanthun gum

Dissolve yeast and sugar in water and set aside. Allow to sit for at least 7-8 minutes or until mixture doubles in size. Sift together dry ingredients. When yeast has doubled slowly pour into dry ingredients while stirring constantly. Continue to stir until dough stiffens and becomes thick enough to work with your hands. Dust a pizza pan and fingers with sweet rice flour. Press dough into the pan to 1/4" thickness. Brush the edges with olive oil and set aside.

Seasoned Taco Meat

1/4 lb ground beef or turkey
1/2 teaspoon ground cumin
1/4 teaspoon chili powder
2 tablespoons tomato sauce
2oz diced green chilies
salt to taste

Mix ingredients together and brown in a medium sized skillet until beef is cooked and most of the liquid has evaporated.

Bean Paste

1 can drained rinsed black beans
3 tablespoons chicken broth
1/2 teaspoon ground cumin
1/4 teaspoon paprika

Place ingredients in a blender and puree until smooth.

Toppings for Pizza

1 cup shredded mozzarella cheese
1 cup shredded cheddar cheese
1/4 cup sliced olives
1 medium diced tomato
1/4 cup diced red onion (optional)
cooked ground meat mixture


Spread bean paste on pizza crust then sprinkle with cheese then top with the remaining ingredients. Place in the center rack in the oven and bake for 15 minutes.


This recipe is featured on The Gluten Free Homemaker's Gluten Free Wednesday's Food Carival.

Cinco de Mayo

Happy early Cinco de Mayo. I am getting this posted early for two reasons. First of all, for a yummy Mexified gluten free dinner you all can make for Cinco de Mayo. Second, I am getting my wisdom teeth taken out tomorrow. Sooooooo being that my next week's meals will consist mostly of anything that can be drank out of a straw my culinary adventures will be put on hold.

Now I just have to say....I think it's kind of funny how we as Americans find any way we can celebrate, eat good food, and be merry...even if we have to borrow other country's holidays. Now I'm not complaining, but Cinco de Mayo isn't even Mexico's independance day. That would be in September. Anyway, all that aside, lets talk food. Mexican food to be exact. Funny thing is...I doubt this salad would be found south of the border, but bear with me. It is a lovely little side that goes well with most any Mexican inspired main course.


Now you can really put just about anything in this salad. (which is the case of how most salads go). I chose some simple components as to not overwhelm the flavors of the vinaigrette. Ok....I admit....I would have added more, but I was a bit lazy and didn't want to cut up anymore vegetables hehehe. So on top of a bed of chopped romaine I added 1 diced tomato, 1/2 cup sliced jicama, 1/2 cup sliced red pepper, and 1/4 cup feta cheese. If you are feeling less lazy than me, some other great ad ins could be avacado, corn, black beans, celery, cukes, you get the drift. Now for our vinaigrette puree together the following ingredients:

3-4 tablespoons fresh cilantro
1 garlic clove sliced
1 jalapeno (this ingredient is optional and will add a nice little kick to your dressing)
2 tablespoons honey
1/4 cup lime juice
1/4 cup olive oil
2 tablespoons cider vinegar
2 tablespoons mayonnaise

That would be it for our tasty little salad :)


Chopped Mexican Salad

2 cups chopped romaine
1/2 cup sliced jicama
1 small diced tomato
1/2 cup sliced red bell pepper
1/4 cup feta cheese

For the vinaigrette

3-4 tablespoons fresh cilantro
1 garlic clove sliced
1 jalapeno (optional)
2 tablespoons honey
1/4 cup lime juice
1/4 cup olive oil
2 tablespoons cider vinegar
2 tablespoons mayonnaise

Add dressing ingredients in a blender then puree until smooth and creamy.

Ok, so that is it for post #1 in our early little celebration dinner.