Pages

Friday, December 31, 2010

Terrific and Tangy Lemon Chicken

Who here misses Chinese food? I know I do! With the soy sauce and cornstarch laden dishes, it's near impossible for me to get in some good Chinese bites nowadays. Thankfully I am learning to master some of their dishes at home :)

This delightful dish is a little twist on the classic orange chicken. Not only is it delish, but it's very easy, inexpensive AND gluten free!

For the tangy tasty sauce (boy, I think I have read my daughter too many Dr. Suess books, I am on an adjective rampage lol!). Peel and remove the white pith on 1 1/2 lemons.Then slice them into disks like so:

Next bring 1 cup water and 1/2 teaspoon minced ginger to a boil. Add the lemon slices and boil for 4 minutes. Remove from heat then pour into a siv and press the lemons to remove excess liquid.
Pour the liquid back into the saucepan and add 1 cup sugar. Raise temperature on the burner to medium/high and bring to a boil. While waiting for the liquid to boil, dissolve 1 Tablespoon arrowroot starch (or corn starch) in 1 Tablespoon cold water. Once liquid boils, stir in corn starch slurry stirring well. Once mixture begins to thicken remove from heat and set aside.

For the chicken, start out with about 15oz chicken breast meat. I like chicken tenderloins as I buy a huge bag at Costco then can take out just what I need. Plus they are already cut into nice handy strips. Now, for the batter, mix 1 tablespoon brown or white rice flour and 1 tablespoon tapioca starch in a bowl. Stir in 1 large egg, 1/2 teaspoon cooking sherry (or rice wine found at your local Asian store) and 1/2 teaspoon Tamari gluten free soy sauce. Give it a good whisking to incorporate all ingredients. 

Next, measure out 3/4 cups Water Chestnut Flour. This was only $1.39 at my Asian shop and this is what will give your chicken amazing crunchy crispiness (once again....having fun with the adjectives)
This is not your typical flour, it's crunchy, clumpy, and bumpy :) You can use a fork to crunch up some of the bigger chunks if you wish. Me, the more texture the better.

Now warm up about 2 cups of oil in a wok or large pot. Once it is hot enough (starts popping when you place a drop or two of water) dip your chicken once in the batter mix then roll in the Water Chestnut Flour. Fry for about 4 minutes on each side of the chicken. 

Now, the gluten free flour mixture is not going to get as golden as your "glutified" chicken, but it will still get a bit of color. 

Drizzle a bit of the sauce over your chicken and serve with a side of rice and your favorite steamed veggie.
Can you SEE the amazing texture the Water Chestnut Flour adds? I'm tellin ya, go get some and just keep on hand. It's worth it and you'd never know this chicken is gluten free :)

Recipe:

Lemon Chicken 
Sauce
1 1/2 lemons, peeled, white pith removed and sliced
1 cup boiling water
1/2 teaspoon minced ginger
1 cup sugar
1 tablespoon cold water
1 tablespoon arrowroot starch

Bring water to a boil and add lemons and ginger. Boil for 4 minutes then strain. Pour liquid back into sauce pan and bring back to a boil on medium heat stirring in the sugar. Meanwhile make a slurry out of the cold water and starch. Stir into boiling mixture and remove from heat when sauce begins to thicken.

Chicken
15oz chicken breast cut into strips
1 tablespoon brown rice or white rice flour
1 tablespoon tapioca starch
1/2 teaspoon dry cooking sherry
1/2 teaspoon Tamari gluten free soy sauce
1 large egg
3/4 cup water chestnut flour
2 cups oil

Mix rice flour, starch, sherry, Tamari sauce, and egg together for the batter. Place Water Chestnut Flour in a medium size bowl. Meanwhile, warm the oil in a large wok or pot. Dip the chicken in the batter then roll in the water chestnut flour and place in the hot oil. Fry for about 4 minutes on each side or until it turns a light golden brown. Place on a paper towel lined plate and pat down with a paper towel to remove any excess oil.

Tuesday, December 28, 2010

Italian Stewed Chicken

Moving along the ethnic food train we come to our stop...Italian Stewed Chicken. Hearty, easy, versitile, gluten free and oh so pleasant on the tongue. You can use this dish to top gluten free pasta or rice. Whatever your little tongue desires.

Start out with 1lb chicken breasts. Please excuse the fact I am halving the recipe for the pictures...it was just the munchkin and I that I was cooking for last night. Place 2 tablespoons olive oil in a large pot and heat up until it starts to ripple. Add your chicken, salt it lightly, and lightly brown on each side. (about 7-8 minutes on each side)

While your chicken is a sizzlin, dice up 1/2 of a medium sized onion (about 1/2 cups worth), 2 celery stalks, and 1/2 cup of zucchini or mushrooms. Either works great or throw in both if you are feeling a little wild and crazy.
 When your chicken is nicely browned on each side, remove from the pan then toss in the diced veggies. Add about 1-2 tablespoons water and 1 1/2 teaspoons minced garlic, cover, lower heat to medium, then cook for about 5-8 minutes until the celery and onion are tender. Now, open up a can of...........Italian Stewed maters. What were you thinking I was going to say??

Add the Stewed Tomatoes and 1/2 teaspoon oregano into the pot add the chicken and simmer uncovered for a good 10 minutes on medium heat to reduce the liquid until it's rich and SAUCEY ;)
Salt and Pepper till your taste buds are tickled and that's all :) This is great over noodles or any sort of rice. 


Italian Stewed Chicken

2 tablespoons olive oil
1 lb boneless skinless chicken breasts
1-2 tablespoons water
1/2 cup diced onion
2 celery stalks diced
1/2 cup diced zucchini or mushrooms
1 1/2 teaspoon minced garlic
1 can stewed tomatoes
1/2 teaspoon oregano

Heat oil in a large pot until it begins to ripple. Add chicken, sprinkle it with salt, and brown lightly on each side (about 7-8 minutes on each side) on medium/high heat. Remove chicken and add diced vegetables, garlic, and water. Lower heat, cover, and cook for about 5-8 minutes or until onions and celery are tender. Add the can of stewed tomatoes, oregano, and re-add the chicken. Increase the heat to medium/high and simmer until the liquid is reduced into a thicker sauce. Salt and pepper to taste.

Monday, December 27, 2010

Asian Chicken Salad

Mmmmm yum yum my tastebuds are STILL reeling over this recipe. It's one of my favorites as it's SO easy, quick, and flavorful. You can also eat it in a number of ways. As an appetizer wrapped in lettuce, topped over rice or rice noodles, or my personal favorite...topped on a veggie salad.

I would recommend going to your local asian shop and buying a package of toasted rice powder. Not required for this recipe, but I HIGHLY recommend it. Your only looking at about $1 and it adds a tasty toasty nutty flavor.

Start out with 1lb chicken breasts or tenderloins. Put em in the freezer and wait until the edges start freezing solid. This will help the blender or food processor evenly grind the pieces. Once your chicken is ready, give a couple good pules in a blender or processor until chicken is ground nicely. Like grinding meat could be considered "nice" hehehe.

Next, spoon ground chicken in a bowl and stir in 1 1/2 tablespoons fish sauce and 1 teaspoon red pepper paste or Siracha sauce (if your not a big fan of spicyness, stir in 1/2 teaspoon). Thai Kitchen makes a fabulous gluten free fish sauce.


Put the chicken mixture into the refrigerator for about 15-20 minutes. Normally by the time I'm done preparing my salad, the meat is ready to be cooked.

When the chicken is ready to be cooked, in a medium skillet, warm up 1/4 cup chicken broth to a simmer. Spoon in the cold chicken and cook over medium heat. DO NOT, no matter how much you feel you need to... salt the chicken. The fish sauce provides plenty of saltiness and fullness of flavor. When the chicken is JUST about cooked (still pink in some areas)

squeeze in the juice of one lime and add some slivered red onions (equates to about 2 tablespoons)

then mix in 2 tablespoons minced cilantro, and 1 tablespoon sugar. Cook for another 5 minutes (or until the chicken broth is mostly gone and onions are tender). Now stir in 1 1/2 teaspoon toasted rice powder and remove from heat.


Yummy.


Like I said, you can serve this over rice, tossed with rice noodles, wrapped in lettuce leaves, or over a salad. I LOVE this on a salad. No dressing needed :) So fresh, flavorful, and simple.

ENJOY!


Recipe:

Asian Chicken salad
1 lb chicken breast or tenderloins
1 1/2 tablespoons fish sauce
1 teaspoon red pepper paste or Siracha Sauce
1/4 cup chicken broth
2 tablespoons thinly sliced red onion
juice from 1 lime
1 tablespoon sugar
2 tablespoons minced cilantro
1 1/2 teaspoons  toasted rice powder

Place chicken in the freezer. Remove and place in a blender or food processor once the edges of the chicken start to harden. Give a few pulses until chicken is ground. Mix 3 tablespoons fish sauce and 1 teaspoon red pepper paste with ground chicken in a bowl then place in refrigerator. Chill for approximately 15-20 minutes. After chicken has chilled, warm up  1/4 cup chicken broth in a skillet until it starts simmering. Add the chilled chicken and cook until the chicken is just about done (small bits of pink are still remaining). Add the lime juice, sugar, and cilantro. Stir well then add the toasted rice powder. Remove from heat and serve as desired.

Friday, December 24, 2010

Asian stores are so awesome

Just a quick little post....if you are celiac you need to find a local Asian store. You will find SO many new and different foods to try. Not to mention flours. Yes....flours. Arrowroot starch, tapioca starch, sweet rice flour, rice flour, even toasted rice powder. I picked these up yesterday for....wait for it.....wait.... $.99!! How exciting is that? I would have spent more than 2 bucks on the same amount of flour at a health food store. Being a "domestic engineer" I need to find the most cost effective ways possible and THIS is my secret :) Just thought I'd share with my buddies in cyberworld. 


Did y'all notice the attempt at displaying holiday colors? Yes, I know...I am a NERD but I couldn't resist ;)  Hope you all have a wonderful holiday!

Jill

Thursday, December 23, 2010

White Chili

Yes folks, this is a post on white chili...Now I know there are about as many white chili variations as there are food blogs but I couldn't resist sharing our family's version with y'all. It's easy, it's quick, and it's quite pleasant on the tastebuds :) Not to mention easy on the pocketbook. It's a nice filling meal when you don't have a lot of time to spend in the kitchen. (Meaning it is a great dinner for Jill to prepare while she frantically attempts to finish wrapping all the Christmas presents and clean house).

Now you can use just about any part of the chicken...just so long as it is about 1lb's worth and it still has the skin. Start warming up a large kettle on high, then reduce heat to medium/high. Place your chicken skin side down and give it a good searing (at least 3 minutes or more on each side). You want the skin to brown and you want plenty of drippings left over in the pot.

While the chicken is cooking, dice up 1/2 a cup onion and one jalapeno.

When the chicken is seared, remove from the pan and set aside to cool. Add the onion and jalapeno in the pan and lower heat. Saute the onion and jalapeno until they are cooked well.

Meanwhile, once the chicken is cooled, remove the skin and discard. Place chicken in the pan and add 3 cups chicken broth. Now I LOVE Pacific brand organic broths. Love. Not like.....Love. Good stuff.

Then stir in 1 1/2 teaspoons ground cumin, 1 teaspoon chili powder, 1 tablespoon minced garlic, and 1/2 teaspoon oregano. Then add 2 4oz cans green chilies and the chicken.

Bring broth to a boil, lower heat to a simmer, cover and cook for an hour or more. Once covered, you don't have to babysit it. Just cover then walk away. Get your things done...wrap the rest of your Christmas presents you have been procrastinating on. Throw in your favorite holiday movie like The Muppet Christmas Carol. You know...those sort of things.

Once your chicken has been simmering for an hour or two, remove the chicken and let cool. Once the temperature has lowered to a point where you can handle it, shred the chicken into chunks then add back into the chili. Whisk in 1 tablespoon arrowroot starch. Drain and rinse two cans of Great White Northern beans and one can garbanzo beans then stir them into the pot. Let simmer for another 15 minutes to thicken the broth then serve :) 


Recipe:

1lb chicken with skin and bone
1 diced jalapeno
1/2 cup diced onion
3 cups chicken broth
1 1/2 teaspoon cumin
1 teaspoon chili powder
1 tablespoon minced garlic
2 4oz cans green chilies
1/2 teaspoon oregano
1 tablespoon arrowroot starch
2 cans drained and rinsed great white northern beans
1 can drained rinsed garbanzo beans
S&P to taste

Warm a large kettle on high, then reduce heat to medium/high. Place chicken skin side down and give and sear at least 3 minutes or more on each side. Once chicken is browned well on each side, remove and allow to cool. Meanwhile, saute jalapenos and onion on medium heat until tender. Pour in chicken broth then stir in cumin, chili powder, minced garlic, green chiles, and oregano. Remove skin from chicken then add into the pot. Bring to a boil, then lower heat to a simmer, cover and cook for at least 1 1/2 hours. Remove chicken, shred and de-bone, then whisk in arrowroot starch. Add chicken back to pot along with the rinsed and drained beans. Simmer an additional 15 minutes to allow sauce to thicken.

Tuesday, December 21, 2010

Cinncinatti Chili

I have my friend Holly to thank for introducing me to this wonderful, unique, peculiar, and interesting dish. Now, I did happen to introduce her to Dave, her husband, so I guess it's a fair trade he he he. My bud Holly originates from OH along with this tasty spaghetti topper and a few years back she gave me a couple chili packets. I was addicted from day one. Unfortunately they have corn in them and I HAD to figure out a way to make this awesome sauce (yes, that was a LAME pun) from scratch.

To start off, I enlisted the help of my my munchkin, my cooking partner in crime. She JUST learned about the "peace sign" and I couldn't talk her out of not signing peace for us all! Note she don's an apron just like mommy. I have been known to be a bit of a messy cook and my trusty apron has saved my shirt a time or two.

Now we line up our list of ingredients. Seeeee simple stuff we all have around the house ;) I did forget to place the 2lbs of beef in the picture but we will get to that later.


Start by warming 2 cups of beef broth in a large kettle. Whisk in 3 tablespoons chili powder, 1 teaspoon cumin, 2 whole cloves, 1 1/2 teaspoons cinnamon, 4 tablespoons cocoa powder (3 if you are one of those weirdos that are not chocolate fans), 1 bay leaf broken in half,  1/4 teaspoon allspice, 1/2 teaspoon salt, and 2-4 tablespoons brown sugar (now I am a BIG fan of salty and sweet, so I prefer 4 tablespoons. Fans of more salty, just stick with the 2), two tablespoons cider vinegar, and 1 can of tomato sauce. If you like a spicy kick, stir in 1/4 teaspoon cayenne pepper.

Next place your 2 lbs lean ground beef in the mix and stir to break it up.

Once beef is broken up into small bits bring to a boil, then reduce to a high simmer (do not cover). Keep simmering stirring occasionally for at least 2 hours until sauce is reduced and the chili is thick and meaty. Keep chili warm while you boil up your favorite gluten free pasta.

Shred your cheddar and mince your onions and top your pasta as desired :) I like my Cincinnatti Chili topped with good ol' chedder and none on the onions. It's different folks, but boy is different tasty, flavorful, and satisfying! Did I mention how AWESOME it is to incorporate chocolate and dinner!?


Recipe:

2 lbs lean ground beef
1 15oz can tomato sauce
2 cups beef broth
1 1/2 teaspoons cinnamon
2 whole cloves
1/4 teaspoon allspice
1 teaspoon cumin
3 tablespoons chili powder
2-4 tablespoons brown sugar
3-4 tablespoons cocoa powder
1 bay leaf broken in two pieces
1/2 teaspoon salt
2 tablespoons cider vinegar
cooked gluten free pasta
minced onions
shredded cheddar cheese

In large kettle whisk together beef broth, tomato sauce, cinnamon, cloves, allspice, chili powder, brown sugar, cocoa powder, bay leaf, salt, and cider vinegar. Stir in beef until broken up completely and blended. Bring to a boil then reduce heat to a high simmer (low/medium heat). Stir occasionally for 2 hours. Top on cooked pasta with cheddar and onions.

*just a note I HAD to add.....I got the "thumbs up" from my bud Holly after her taste test a OH native :)

Sunday, December 19, 2010

Spiced Pumpkin Cake

This being the last week until Christmas my kitchen has been buzzing with treats, sweets, and such. Today's flare for the day is pumpkin cake. Kyle has a couple of co-workers that are celiac, so I decided it would be a good opportunity for this recipe.

Preheat oven to 350.

Start out with 2 eggs and beat until light and frothy.  


Then add 1 cup brown sugar and mix until creamy. 


Then mix in 1/4 cup olive oil and 1/4 cup coconut oil (now don't worry if you don't have coconut oil on hand, just use 1/2 cup vegetable oil). I like to use healthier oils in my cooking and always have coconut oil on hand. Once blended spoon in 1 cup pumpkin puree and 1 teaspoon vanilla mixing well.

Meanwhile, measure 1 cup Bob's Red Mill Gluten Free flour blend, 1 teaspoon cinnamon, 1/2 teaspoon baking soda, 1/2 teaspoon baking powder, 1/4 teaspoon salt, and a dash of allspice and nutmeg and sift well until all the ingredients are incorporated. Add to the wet ingredients a little at a time mixing for 2 minutes until it's nice and smooth.


Don't forget to scrape down those sides ;)

Now, you will want to resist licking the cake batter....As Bob's Red Mill Gluten Free blend is a bean based flour...it is ummmmm....not so tasty raw (putting that lightly). Yes, take a lesson learned from me. Do not stick your finger in the batter then do NOT stick the cake batter coated finger in your mouth ;)  Pour into a greased cake pan and bake for 30-35 minutes or 20 minutes if baking cupcakes or in my case, small cake loaves.

Let cool before removing from the pan.


Recipe Breakdown:

2 eggs
1 cup brown sugar
1/4 cup light olive oil
1/4 cup coconut oil
1 teaspoon vanilla extract
1 cup pumpkin puree
1 cup Bob's Red Mill Gluten Free flour blend
1 teaspoon cinnamon
1/2 teaspoon baking soda
1/2 teaspoon baking powder
1/4 teaspoon salt
dash of allspice and nutmeg

Preheat oven to 350 degrees and grease cake pan. Beat eggs in large bowl until light and frothy. Add brown sugar and beat until smooth. Add pumpkin and oil. In separate bowl, whisk/sift together dry ingredients (gluten free flour mix through salt) Add to the wet ingredients a little at a time and beat until smooth (2 minutes). Pour batter into a pan and bake for 30 minutes or pour into cupcakes and bake for 20 mins.

Tuesday, December 14, 2010

Cherry Chocolate Macaroons

Cherries and Chocolate. Can you really go wrong with that combination? Just saying it, cherries and chocolate, brings a gush of saliva to my mouth lol! Ok, so maybe that was a little TMI hehehehe.

Sooooo a local Celiac Support group is having thier monthly meeting and for December they are doing a cookie swap and I think "PERFECT opportunity to bust out the cherry chocolate macaroons". (boy if I keep saying that, I will need a bib). This is such an easy recipe and I am excited to share it with you. 

You start with melting your chocolate. I am a big dark chocolate fan so I like to go for the semi-sweet Bakers Brand Chocolate squares. I throw in about half a box in my mini slow cooker on high while I am making the cookies. The chocolate should be all melted and ready to go by the time the macaroons are out of the oven. Then pre-heat the oven to 325.
Next throw 3 egg whites in a bowl and start blending on high. You will do this for about 3 minutes until they become stiff and start forming peaks.
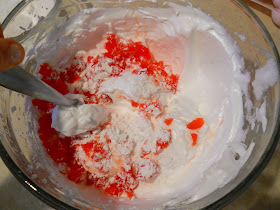
Now measure 1 cup sugar and add it to the eggs 1 tablespoon at a time while still blending on medium. Once all the sugar is added, the mixture should become very glisteney (is that a word??? Or another Jillism???). It is very pretty to look at isn't it?

Seeeeee! It glistens! Hence....glitseney ;)

Next, mince up 1/2 cup drained marachino cherries and 1 teaspoon vanilla extract and add to the glistening egg whites. Then measure out 3 tablespoons sweet rice flour and 1/4 teaspoon salt (sifted together) and gently fold in 1 tablespoon at a time.
Next, gently fold in 2-2 1/2 (depending on how coconutty you like your macaroons) cups shredded coconut. Unfortunately I was too busy snacking on the coconut to take a picture of this process. Just use your imagination on this step.

Once coconut is folded in, spoon about 2" balls onto a greased wax paper, and bake for 8-11 minutes. 

Bake until just the tips of the cookies start to turn golden brown. You don't want to over cook and overtoast the coconut. Once cookies are cooled, drizzle on the luscious melted goodness.

Now I just need to refrain from devouring them before I make it to the meeting tonight lol!

Recipe Breakdown:

Cherry Chocolate Macaroons

Melted chocolate of your choice (about 1/2 cups worth)
3 egg whites
1 cup sugar
3 tablespoons sweet rice flour
1/4 teaspoon salt
1/2 cup minced marachino cherries
2 - 2 1/2 cups shredded coconut
1 teaspoon vanilla extract

Pre-heat oven to 325. Begin melting chocolate. Sift together sweet rice flour and salt then set aside. Beat egg whites for approximately 3 minutes or until they start forming stiff peaks. Reduce speed to medium and add sugar 1 tablespoon at a time. Keep mixing until eggs become very shiny and stiff. Slowly fold in vanilla extract and cherries then add the flour/salt mix 1 tablespoon at a time. Next gently fold in the coconut. Place on greased wax paper and bake for 8-11 minutes or until the tips of the macaroons start turning golden brown. Do not over cook. Remove and cool. Drizzle melted chocolate on cookies then allow to cool completely.

Monday, December 13, 2010

Apple Cider Beef Stew

 Happy Winter Day my friends

I figured I would post a lovely winter scene to make up for the lack of winter we are currently having in Utah. I mean, it's RAINED the last couple days. RAIN....not snow. Very depressing. That being said, one of my little families favorite meals in the winter is warm and satisfying soups. Apple Cider Beef stew is one of our tummies favorites. It has a tangy twist on an old classic. Another great thing is that you can either cook it up quickly on the stovetop or plop it all in a slow cooker. 

For the apple cider, you will want to use spiced and opaque cider. The clear Tree Top version will not do and the taste will be a bit funky. If cider is out of season, head over to your local health food store and look for Knudsen brand apple cider. Its good stuff and can be found year round. Litehouse brand is also perfect for this stew and can be found in most grocery stores near the salad section. I like to freeze the extra in pre-measured servings.
Now this recipe ALSO calls for celery, but my kitchen was lacking the green stalked vegetable so I improvised and used 1 cup of chopped cabbage instead.

Start out with 1 tablespoon brown rice flour and 2 tablespoons sweet rice flour (you CAN use tapioca flour instead of the sweet rice. Both will thicken the stew just fine). Then add 1/2 teaspoon thyme, 1 teaspoon salt, and 1 teaspoon garlic powder in a gallon bag. Toss it around to incorporate the ingredients then throw in 1lb of beef stew meat.
Toss and roll the beef in the mixture until each piece of meat is covered. Then warm up 2 tablespoons of olive oil in a large kettle. Once oil is warm and starts to ripple, dump the entire contents of the bag in. Lower heat to medium and quickly brown the beef (for about 5-10 minutes). Once beef is nicely browned on all sides, it is time to make a choice. Either throw it in a slow cooker, or keep it in the kettle. Today I chose the slow cooker. I had a few things to do and it was nice to be able to leave my home and come back to a yummy cooked dinner. Sooooo throw the cooked meat in your slow cooker like sooooo.... (like you needed to see what meat in a slow cooker looked like, but I was having fun taking pictures hehehe).
Speaking of pictures....I just LOVE my spoon rest :) I got it for my shower from my Grandma Reva. She is a yard sale shopping professional. That woman has it down to a science! I am sure it was one of her "finds" and I am SO glad she found it. It's too cute not to share.
Now, add 2 cups apple cider (don't forget to shake it up), 1-2 cups water (depending on how soupy you like your stew) and 2 tablespoons apple cider vinegar (rice vinegar also works well with this recipe). The vinegar is a natural meat tenderizer along with the cider (that is why you can get away with tender beef chunks by cooking it for a short time on the stovetop). Turn the slow cooker on medium and start chopping your vegetables. I like to use 1/4 of a red onion, carrots, red potatoes (or any potato for that matter), and celery. All of your chopped veggies should all measure to about 2 1/2 cups total.
I will say, the cabbage actually was pretty good in the stew. I do prefer the taste of celery in this dish, but I had to improvise and I had plenty of cabbage on hand. So I thought, what the heck?

Next stir in your veggies, cover your slow cooker, and cook on medium for 5 hours. If you are cooking on the stove top, bring soup to a boil, reduce heat to a simmer, cover and cook for about 20 minutes or until the carrots and potatoes are tender.
And that's really all there is too it. This is a sweet, tangy, satisfying stew to warm you up on those winter nights. Did I mention how easy it is too?

Here is the recipe breakdown:

Apple Cider Beef Stew

1 lb beef stew meat
1 tablespoon brown rice flour
2 tablespoons sweet rice flour or tapioca flour
1 teaspoon salt
1 teaspoon garlic powder
1/2 teaspoon thyme
2 tablespoons olive oil
2 cups opaque spiced apple cider
1-2 cups water
2 tablespoons cider vinegar
2 1/2 cups of diced vegetables (red onion, celery, carrots, and potatoes) Or cabbage if you are in a pinch and have no celery lol!

Toss stew meat, flours, salt, garlic powder, and thyme in gallon size ziploc bag until meat is completely coated. Meanwhile warm olive oil in a large kettle until oil becomes rippled. Lower heat to medium and brown meat on all sides. Transfer meat into a slow cooker heated to medium and add water, cider, and vinegar. Stir in diced vegetables, cover, and cook for 5 hours.

That's all there is to it!